Module 26: Application Project
Learning Outcomes
When you have completed this module, you will be able to:
- Within a three hour time limit, complete a lab exercise without the aid of a key.
AutoCAD 2D is written in competency-based modules. This means that you do not complete each module until you have mastered it. The Application Project module contains a comprehensive lab exercise to test your mastery of the set of modules you have completed. As it is intended to be checked by your tutor, there is no key. If there are parts of this module that you have difficulty completing, you should go back and reread the module or modules that contain the information you had trouble with. If necessary, repeat the lab exercises as many times as necessary until you fully understand the material.
If you are completing this book:
- Without the aid of an instructor, complete the lab exercise.
Lab Exercise 26-1
| Drawing Name | Template | Units |
|---|---|---|
| AutoCAD 2D Lab 26-1 | 2D Layout English | Inches |
Step 1
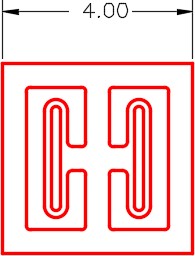
On layer: Object, draw the object shown in the figure. Draw it anywhere in Model space. (Figure Step 1)
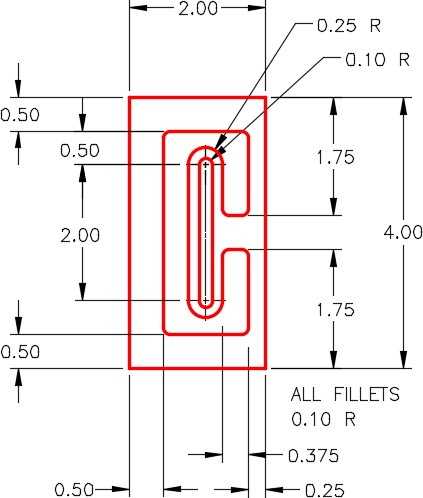
Step 2
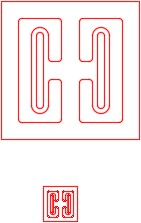
Using the MIRROR command, mirror the object and make the necessary changes to match the figure. (Figure Step 2)
Step 3
Complete the object by erasing and extending all lines so they are all continuous in length. This object will be referred to as the original object in this lab exercise.
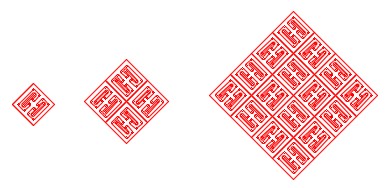
Step 4
Copy and scale the original object at a scale factor of 0.25 to a location anywhere in Model space. The smaller object (scaled object) will be referred to as the scaled object in this lab exercise. (Figure Step 4)
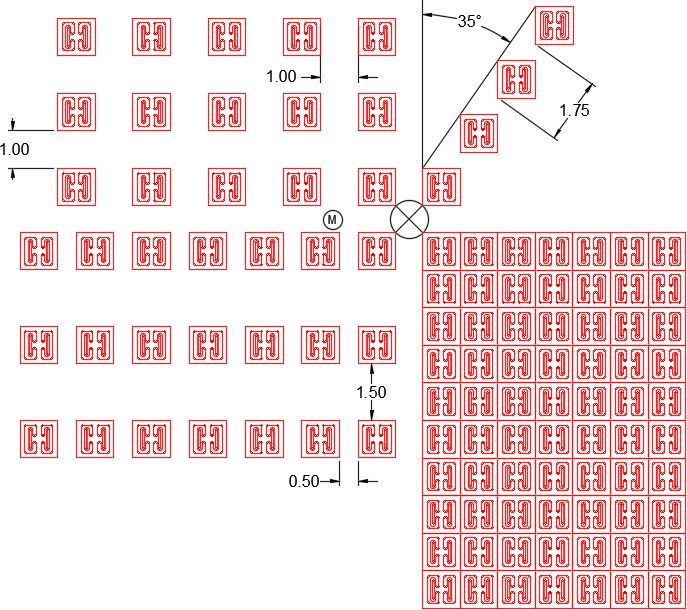
Step 5
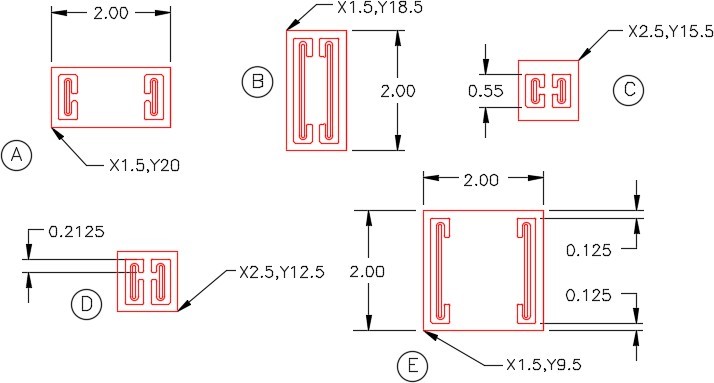
Complete the following steps: (Figure Step 5)
A Copy the scaled object to the coordinates shown. Stretch it to match the dimensioned drawing.
B Copy the scaled object to the coordinates shown. Stretch it to match the dimensioned drawing.
C Copy the scaled object to the coordinates shown. Stretch it to match the dimensioned drawing.
D Copy the scaled object to the coordinates shown. Stretch it to match the dimensioned drawing.
E Copy the scaled object to the coordinates Stretch it to match the dimensioned shape.
Step 6
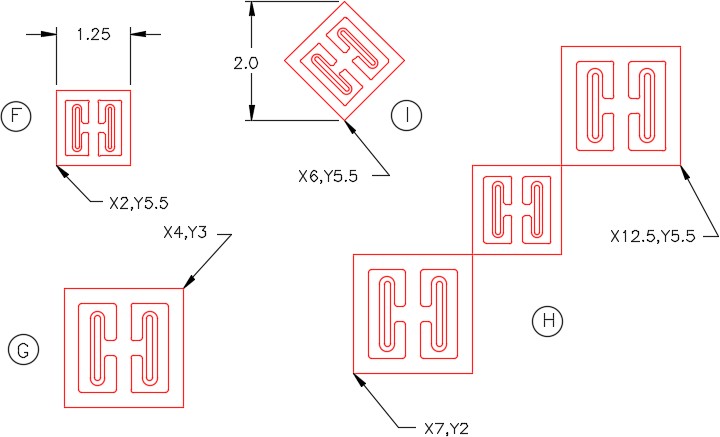
Complete the following steps: (Figure Step 6)
F Copy the original object to the coordinates Scale it to match the dimensioned drawing.
G Copy the original object to the coordinates shown. Scale it to a scale factor of 5.
H Copy the original object to the coordinates shown. Scale the two outside ones to a scale factor of 0.5 and the center one to fit.
I Copy the original object to the coordinates shown. Rotate it 45 degrees and scale it to match the the figure.
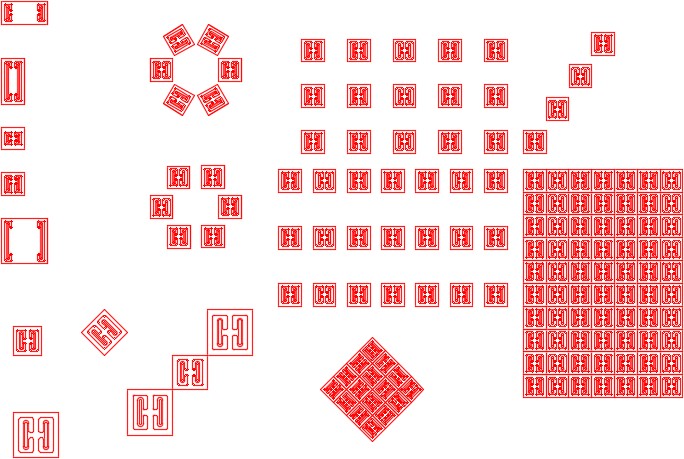
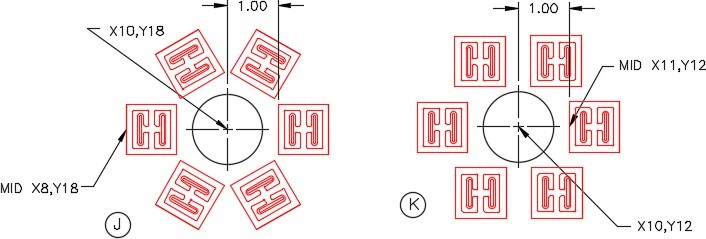
Step 7
Complete the following steps: (Figure Step 7A and 7B)
J Draw a 1.4 diameter construction circle at the coordinates shown. Copy the scaled object to the coordinate shown. Array the object to match the figure.
K Draw a 1.4 diameter construction circle at the coordinates shown. Copy the scaled object to the coordinates shown. Array the object to match the figure.
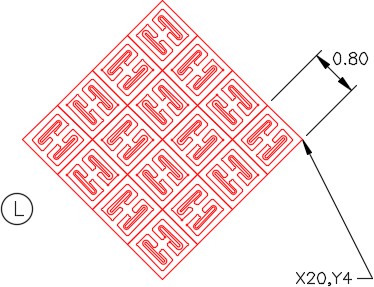
L Copy the original object anywhere on the drawing. Scale the object to match the given dimension. Rotate it 45 degrees. Using 2 polar arrays, complete the diagram shown below. Move the finished objects to the coordinates shown in the figure.
Construction Hint
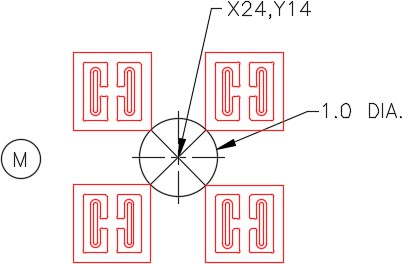
Step 8
Complete the following: (Figure Step 8A and 8B)
M Draw a construction circle at the coordinates shown. Copy the scaled object to the four locations shown. Execute the ARRAY command, four times, to match the figure.